This post is full of mutinae and error management, although the project is proving quite satisfying.
Collar and stands, facings
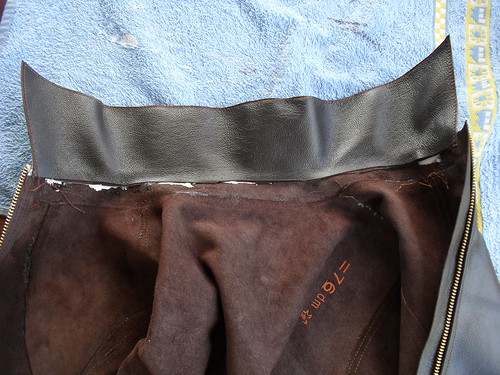
The last thing in the previous post was the attachment of the outer collar band. I topstitched this straight away, which was a mistake, as later on you are supposed to topstitch through both inner and outer collar stands.
I did not unpick it.
Next I contstructed the collar. I should mention here that I used no interfacing for this jacket, although it is used by Burda. My leather, goat skin, has plenty of stiffness without any interfacing. I would use interfacing with a more pliable leather such as the much more expensive lamb skin that I have lurking in my stash. In my sample session I used iron on interfacing and it adhered nicely at the silk setting without scorching the leather.
I had some idea of making the collar as if it were regular fabric (right sides together and topstitching for seam flattening), but my leather was too thick to turn the points properly. I cut out another collar, glued the wrong sides together at the edges as per the Burda instructions, but trimmed the undercollar by 5mm and pulled it taught to get a bit of curve. As the leather glue is strongly and quickly adhesive, this worked quite well, and the collar maintained a little shape after topstitching.
I glued the collar inside the outer collar band. This was a 3 hand job again, due to the curved collar and I recruited a gluing assistant.
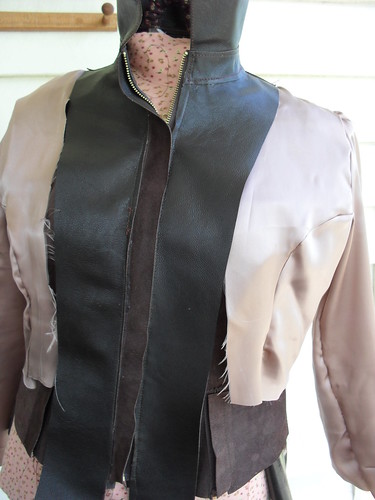
Sew back and front facings together
I found my dress form invaluable for the next few steps. I turned the jacket inside out, and glued the back facing to the inside of the neck seam allowance, snipping the facing seam allowance as needed.

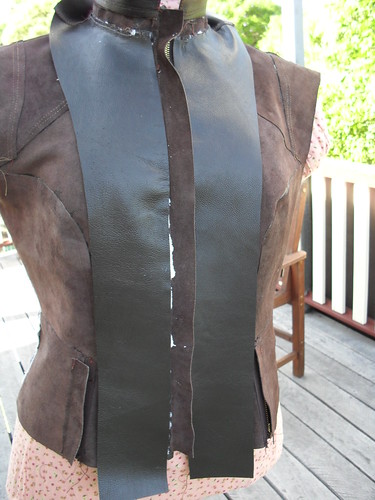
After this was dry, I did the same thing to the neckline of the front facings, allowed these to dry, and glued the front facings to the zipper tape/butting up to the zipper guard, to within 1 cm of the bottom of the jacket. (I had cut the facings extra long, as I did not bother transfering the FBA to the facing during my pattern alteration phase.)
The next step was quite confusing. My little elephant, the sole reviewer * of this pattern at pattern review, (it is a very good description of her construction process) described some difficulties here, and said she would be interested to see how other people managed it.
The instructions are rubbish. They jump straight from attaching the collar stand to finishing the hem of the body of the garment, then jump back to the collar. Reading the step of the instructions whilst considering only the collar has one looking for a hem to fold up, glue and stitch where actually you need to trim all the seam allowances from the inner collar stand, which is something Burda forgets to mention.

With the jacket still inside-out on Genevieve my dress form, I glued the trimmed inner collar stand over all my messy seam allowances, most satisfying.
Unfortunately I then had to deal with mistake management. Having already topsitched the outer collar,I had some trepidation regarding topstitching again, thinking it would look horribly messy.
I had no qualms about topstitching the facings, which I did from the outside as a second line next to the zipper topstitching. This matched nicely the two rows of topstitching I had used for the joining seams throughout.
I made some samples, and decided to topstitch the collar stand from the inside instead. I had been using regular thread for the bobbin stitches, and although you can see these stitches if you look closely, they are not as obvious as the jeans topstitching thread, and fortunately, the stitches are all within the two rows of topstitching already present on the outer stand.
At this point I had some thread ends that I could not pull through to the inside and tie off, nor could I pull them between the collar labels, due to glueing and the permanency of holes in leather.
I researched this issue at work. One of my long term clients is a retired leatherworker (I have some very useful people coming into work). He said I could melt the thread ends without hurting the leather.
I was dubious.
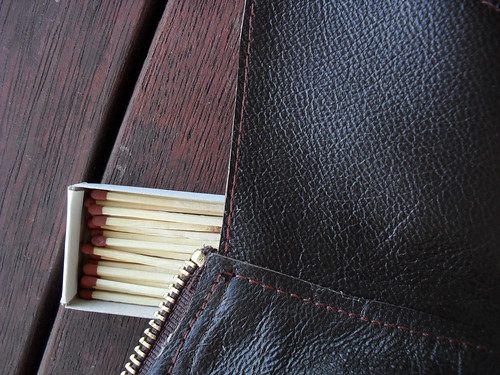
I was wrong,it worked perfectly, although I admit to blowing the match out extremely quickly, and pinching the (polyester) thread as soon as it started to melt. There is a tiny black blob at that corner.
Sleeves
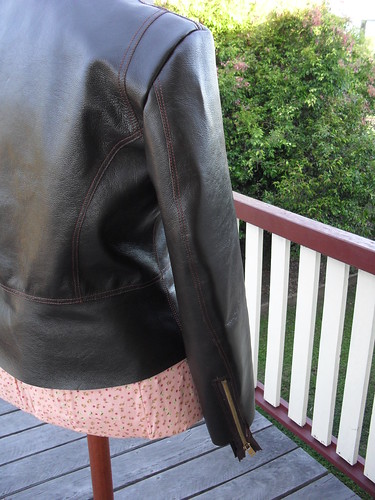
The zipper construction for the sleeves is the same as for the zips at the front peplum. Again the zip length described by Burda is incorrect. I have no idea why they ask for 10cm and 14cm zips, as both are too long for a size 19 (38 petited) jacket. This time I did not shorten the zip, I lengthened the zip cut-out on the sleeve instead, much less work! Again I added zipper guards.
The outer seam is glued and single lapped, and the under arm seam is stitched wrong sides together. I used my Janome,a 100 Denim needle (it was auditioned earlier as it was already in the machine and worked fine, so I didn't upgrade to to a leather needle). Burda wants you to open this seam and glue down the insides, but as I was

(The zippers are hanging out the end here as the cuffs are attached later, after the lining)
Having previously made this pattern without pinning, I was not concerned about sleeve insertion, but the leather was not nearly as co-operative as the denim of my previous jacket. I tried paper clips, bull dog clips and hair clips at the shoulder point, but they kept slipping as I turned the armscye on the machine bed.

The haemostat worked perfectly, being designed to hang on until unlocked. It would have been even more useful had I more than one in my sewing kit.
The sleeves were sewn to the jacket on the Janome again.
Lining
I have deviated wildly from the Burda lining here, due to my
My lining fabric is sand washed silk. To make the lining pattern, I used the sleeve pieces and upper bodice pieces without the peplum. At the front I abutted the shoulder with the yoke and front to make one piece, and the side fronts as the other pieces, at the back I abutted all the pieces above the peplum and added a 5cm pleat to the centre, following the Burda instructions. All the pieces were cut out 5cm longer than the pattern for ease. I sewed them on the Janome, using a size 60 microtex needle. At the outer sleeve seam, which has a zip in the leather, I finished the open edges with rolled hems. The other seams were finished with pinking shears, after a wildly unsuccessful pass with the overlocker lead to a decision that this would be a nice finish.
Burda has you bag the lining. I didn't do this.
I put the jacket,inside-out with sleeves turned in, on the dressform again, and lay the finished lining over it, tucking the edges of the lining under the facing, and marked the line of the facing onto the lining with tailors chalk. I then basted this line on the lining, and used it as a guide to the seam line to stitch the lining to the facing, right sides together. I had forgotten to change the needle, and this (size60 microtex) sewed easily through the silk and leather.
During this process I added a small pocket to the front, under the bust line.
This was not very successful. I tried sewing the zip right side to the leather and turning, which was bulky. In retrospect, I should have lapped the leather facing over the right side of the zipper tape.
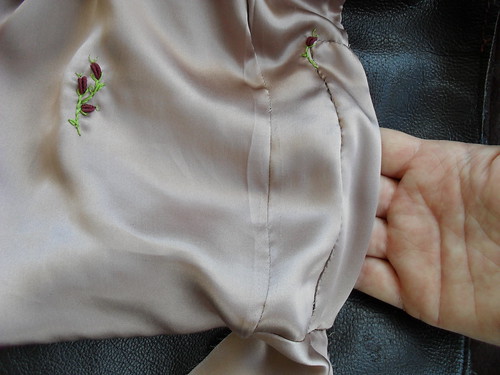
I covered up most of the mess with a faux welt, hand sewn to the lining, and the pocket is both functional and not apparent from the outside. You can see above that sandwashed silk shows every needle hole, the bullion roses I used to hold up the pocket bag on the inside, and for fun on the welt.

I hand sewed the rolled hems to the zipper tape and the stitches attaching the zipper guard at the sleeves. I would have liked more length ease in the sleeves, 5cm is barely enough.
The peplum facing is the back and front peplums abutted. I sewed this, right sides together to the bottom of the lining front and sides, easing the lining slightly to fit, then turned it right side out.
I glued the peplum at the hemline of the jacket, and at the sides to the zipper tape. Later this will be topstitched and trimmed at the hemline, like the collar.

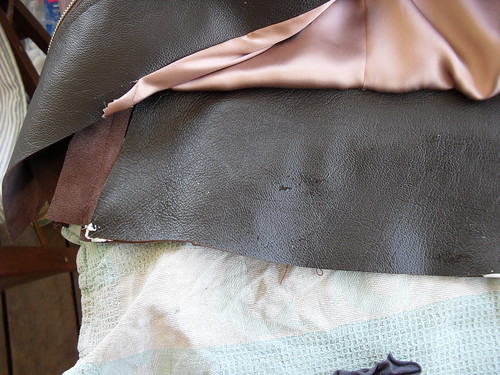
Now it gets messy. The facing does not extend to the zipper at the lower front. I had to glue in an extra piece after glueing the hem of the facing and was in a bit of a quandry about what to do with the lining hem.

First I hand stitched the lining to the facing where it was not machine stitched (piercing the leather), then sewed the hem of the lining by turning it under and stitching through the back of the stitches from the peplum-side topstitching. This might have worked better with a less slippery fabric,
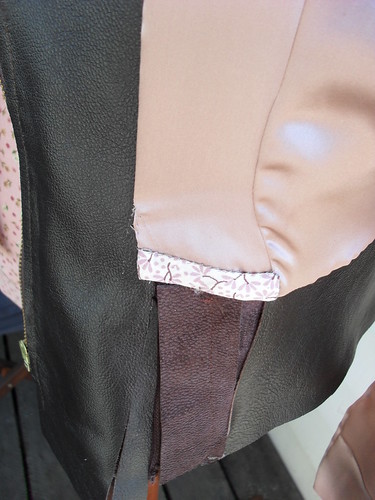
I though about sewing a trim of some sort over my dodgy seam, but did not have anything suitable. This is a bias tube of some voile with a print containing both the lining and leather shades, best I could do at the time. I am hoping it will not annoy me too much when I put on the jacket.

The cuffs are glued to the free zipper tape and the bottom of the sleeve. I rolled some rags inside the sleeve, and did this in two stages for each cuff. Next the cuff is folded to the inside and topstitched at the zipper tapes and sleeve to attach both layers. Then it will be finished!
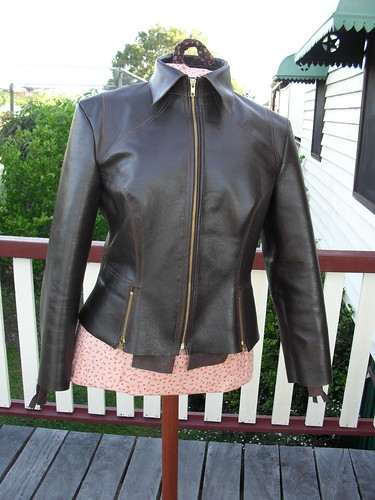
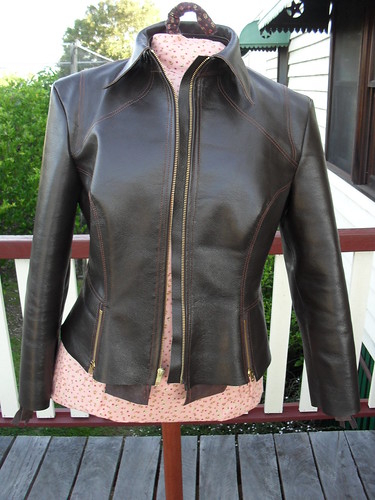
I am pleased with what I have learnt from this project, and I think the jacket looks good - photo shoot after the last little bits are completed.
Materials Sources: Leather,glue
lining silk
brass zippers
Other things I found useful: Singer 28 hand cranked sewing machine for straight topstitching and oomph in piercing many layers of leather. Double tracing wheel to mark seam allowances unobtrusively on leather,Jeans topstitching thread, heavy needles (110 and 100), disposable gloves for glueing (I used about half of a 100 box,there is a lot of glue a bit-wait-a-bit(sew something else whilst waiting)-glue a bit),helpful extra person to help hold curvy seams whilst glueing, dressform for collar and facing glueing, draping lining, haemostat for clamping seams togther.
Vital: well ventilated area for glueing
Some on-line reading about leather jackets.
The sewing lawyer
Leather jacket sew-a-long at Stitchers Guild
How to sew leather on a standard machine, links to other leather sewing advice
I also used my 1970's Reader's Digest Complete Guide to Sewing, which has good tips about choosing your leather.
*(Debra Martin has written about making this pattern in faux leather here, which has been very useful to me)
23 comments:
You are going to be one hot mama wearing this sexy little number! ;-) This looks awesome!
This is beautiful and I commend you on your thoughtfulness through the process and dedication to quality techniques. I am taking all your experiences in this process under advisement, as I have some shearling leather that I want to make onto a coat this winter, but am entirely too scared about to embark on the project yet. You are helping me to believe that I can actually do this.
I'm completely in awe and don't even know where to start raving about here
The fact that you handworked those exquisite little bullion roses at the attachment point of the pocket, dear me, I'm speechless with admiration...
Wow! What an impressive project! Thanks for posting all this detail about your construction process. It will be invaluable when I (gasp!) venture into the making of a leather garment. Can hardly wait to see the pictures of the finished product on you. I am sure it will look just fabulous!
Wow! What an impressive project! Thanks for posting all this detail about your construction process. It will be invaluable when I (gasp!) venture into the making of a leather garment. Can hardly wait to see the pictures of the finished product on you. I am sure it will look just fabulous!
you are too be congratulated in doing so well in such a challenging project (even looking at your photos makes me nervous) .. you are doing so much problem solving with all the things you have to factor in, this will always be your "McGiver" jacket in my head.
You're going really well. Thank you so much for the details about your jacket. You are going to look fabulous in this jacket.
I am speechless - this is just stunning!!! From gluing to burning to bullion roses - you are one talented women...
Oh, Karen, this is AMAZING. GORGEOUS. WOW.
Ok I officially hate you! You are amazing! You are doing a fantastic job... I have no words!
It looks amazing! I want one!
Thank you so much for providing so many pictures and providing detailed explanations along the way. I'd like to tackle a leather jacket someday, and your blog posts would be the first place I would look.
Wow, the jacket looks amazing!
It's looking fantastic!
Loving it!
Incredible!
Fantastic jacket! This is an amazing project.
Thank you for posting so many pictures and details of the process.
Absolutely stunning you are inspiring. I really appreciate your detailed information and sources thank you.
That really looks spectacular, Karen, very impressive!
I'm mega impressed with this jacket. I doubt that I have the patience to take on something like this and until Molly evolves and grows opposable thumbs, I don't have a spare pair of hands in my house to help with gluing, so I will admire yours from afar. Congratulations on such a great job!
What an incredible project. Sounds like an incredible amount of time and problem solving has gone into this one. I'm sure it must be very satisfying. You must be feeling quite chuffed with yourself. The last photo looks so professional. Looking forward to the photo shoot!
Gosh I am impressed by your jacket. I was so tempted to buy some nappa leather in London, but am a little fearful of leather sewing.
Absolutely wow and amazing Karen. It looks fantastic but I shall not be attempting to make my own.
The amount of work, and problem solving that has gone into this project thus far is staggering. You are doing an amazing job and the jacket is looking so very chic.
Post a Comment