
1. Cutting out the leather.
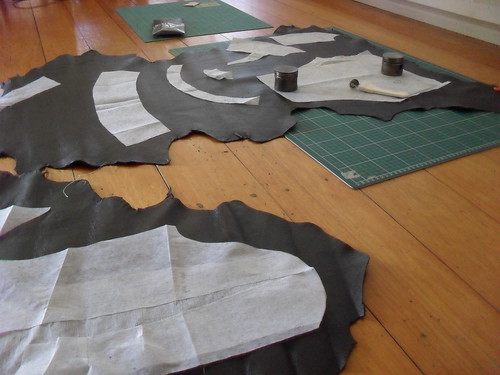
I lay the skins out on the floor, and after inspecting them for holes and thin spots, lay out all the pattern pieces with room for seam allowances.
I cut them out by placing a cutting board underneath the skin of interest, weighting the pattern piece, and tracing around it with a double tracing wheel, set at 1.5cm seam allowance. I then cut on the seam allowance line with a rotary cutter, freehand, something I had not tried previously.
2. Audition thread, needles, feet and machine to use

I used jeans topstitching thread, a long stitch, and a size 110 denim needle. As I was using my hand cranked Singer 28, I was not able to use a teflon foot nor a walking foot, but the Singer fed the leather through rather nicely.
I had bought a leather needle, but decided not to use it on this relatively thin leather, as the 110 denim needle was working quite well.
I made this little bag as my needle/thread/tension test sample.
2. Glue and stitch construction
I felt as if I were making a kayak here. (My husband builds glue and stitch kayaks and canoes)
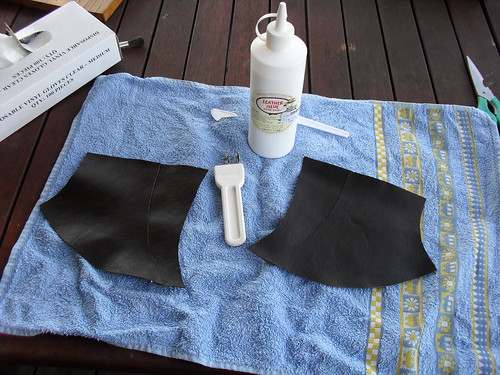
The Burda instructions are to use a glue stick to attach single lapped seams, then to edgestitch. I had read elswhere that only leather adhesive should be used on leather, as other adhesives can weaken the leather and make it rot, so I used leather glue that I purchased at Packer's tannery Narangba. It is rather tacky, has instructions to wear gloves and safety glasses, due to toxicity, but dries in 2 minutes, so made the gluing process relatively quick. It dries clear, and whilst still white, can be removed with a damp cloth. I used a lot of damp cloths.
The Burda instructions are a little confusing regarding the direction of the lapped seams, so I looked closely at the magazine photo to help me choose the direction and order of construction.
I found it difficult to mark the leather using tailors chalk or removable pencil. I used the double tracing wheel on both pieces to remove the seam allowance on the over piece, and to mark the placement line on the under piece. The tracing wheel made a just visible line, which was not apparent once the seam was glued and sewn.
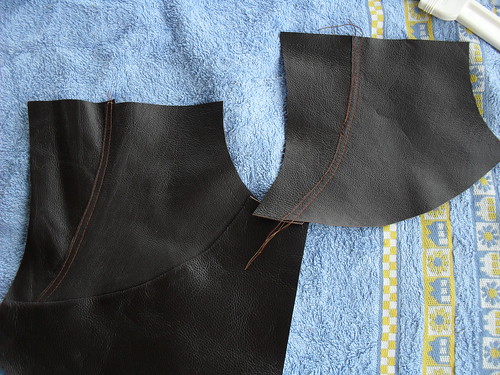
2. Fronts
Inner yoke over outer yoke
I decided that a double row of stitching was both more practical and more decorative, and have used this stitching throughout.
Here I was glad that I had plenty of leather, as I stitched badly, and recut and sewed the upper yoke in an attempt to improve my stitching accuracy.
Lower inner front over yoke
3.Attach front side zips - diversion
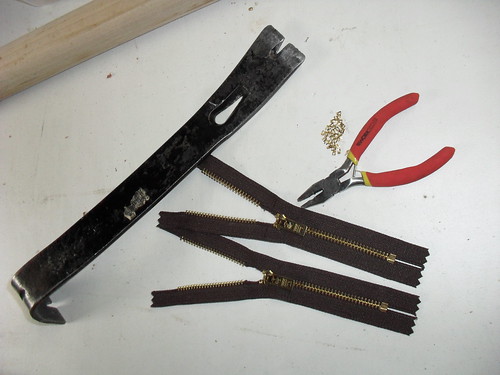
The zip length required for this zip is not the same as the length Burda describes in the pattern requirements. This was a little annoying. I tried removing the zipper stops per the Burda instructions for shortening the central zip, but had no success.
I called in the calvary.
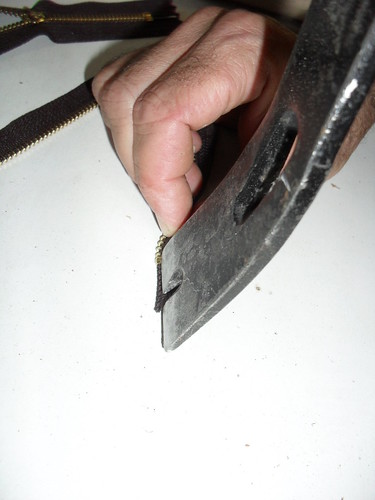
Removal of the stops required the use of a cats claw nail puller, wedged under the stop, and struck firmly from above - a 3 hand job.
After that, removing zipper teeth and re-applying the zipper stops with normal pliers was pretty easy
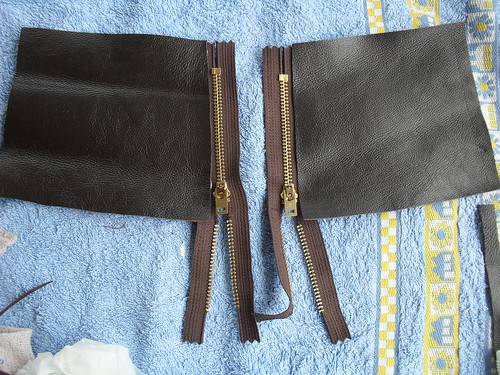
I attached the zips to the lower fronts with a single row of stitching, as I had decided to save the second row of stitching for attachment of a peplum facing.

Upper side fronts over lower side fronts
Central front over side front
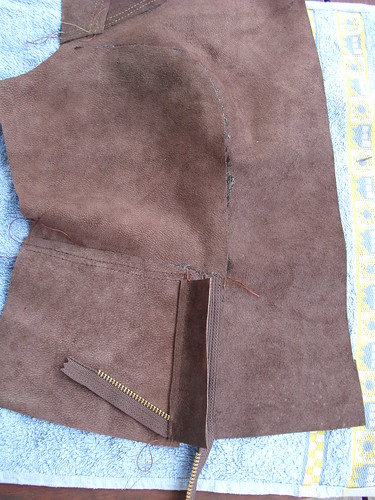
This was tricky. There is a FBA here, and the seam is rather curvy. I recruited my daughter to hold down one end of the seam whilst I carefully pressed out the ripples against the tacky glue.
I also added a zipper guard when stitching this seam.
Centre back over back shoulder
Centre back over side back
Upper back over back peplum
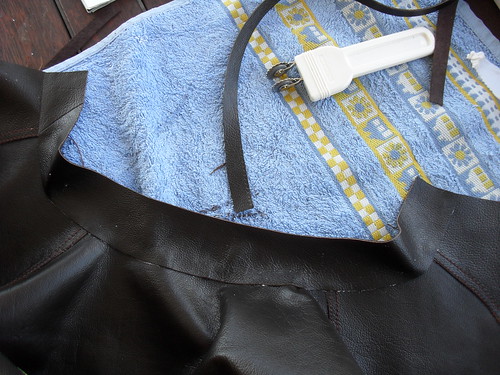
Front shoulder over Back Shoulders

Back side seams over Front side seams (obeying Burda, in retrospect I would have left this until after the collar and front zip insertion). This was also tricky, as I had failed to add the adjustments I made to my denim version to the pattern, and somehow just cut out the side seams per the pattern, instead of adding one cm to each seam - I did not trim the seam allowance off, and overlapped the seam by the smallest possible amount
Outer collar stand over neckline
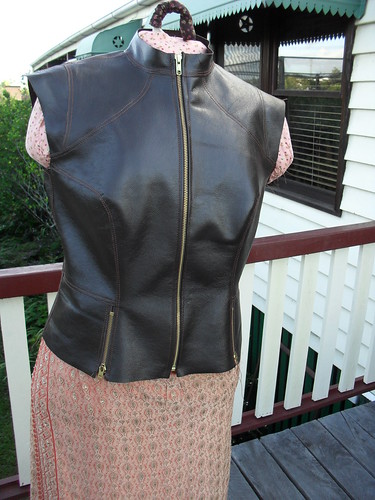
Front zip, no raw edges, topstitched, and with zip shield added.
I am really keen to keep going, but am feeling a bit too tired to continue - I would be sure to make a mistake.
I am back to work tomorrow, but hopefully can get more done during the week.
21 comments:
Wow! You achieved an enormous amount for one day. What a great start to your sewing year. It looks terrific.
Amazing ... looks great so far! You are such an inspiration!
Your jacket is looking really great. Everything you've done so far is so well thought out. I like your test zip bag.
Wow! That's gorgeous, and I shall not be attempting one. If you decide to make a leather skirt, let me know.
Thank you for the excellent blog entry on this! Really, really helpful. Can't wait to see it, it look fabulous so far.
That is looking AMAZING! Looking forward to seeing the finished article. Love the bag too. :)
WOW! Looks utterly amazing! A very impressive amount of work in one day, and thank you so much for documenting this process so fully. I will be referring to this excellent and very informative post if ever get up the courage to work with leather!
Wow, that is *quite* the project! But it looks amazing so far. Very impressive!
Wow, it looks smashing! I am so impressed. Thanks for all the great tips and the detailed notes on your process. Happy new year!
Wow, you've made great progress!
Impressive. I agree you got so much done in one day. And the jacket is wonderful. Wishing you more sewing time this week.
OMG - this is AWESOME! I can't get over how well made it is. And how utterly complex. Great work.
This is such an exciting project! I love all the pictures and details that you shared so I can enjoy this vicariously as I would never attempt such a project!
WOW. I am blown away. Looking good so far.
Should be wonderful when it is done.
wow - it looks amazing - and you've done the trickiest part I recoken - the zipper insertion. Interesting to read the denim needle was better than the leather needle - I found the leather needles great but was using kangaroo leather which is very tough..
Love how your leather jacket is progressing- fingers crossed for a cool patch soon so you can wear it (I've made 2 winter coats mid summer so sometimes it's just the thrill of the impossible)
Very impressive! It looks fantastic so far. Thank you for sharing the techniques that you are trying.
Stunning, you have done an amazing job and can't wait to see your progress. Thank you for all the tips and detailed photos, a great reference for the day I make mine.
Amazing! I can't wait to see it finished.
I'm speechless- what a great job you've done. Thanks for the blog tutorial too
This is a wonderful project-it will be perfectly made, very stylish and people are sure to be amazed that it is handmade. I am looking forward to the next installment :-)
Wow, this is beautiful. You are brave to put all those seams and zippers in leather.
Post a Comment